Subject: Crossfire Red-Neck Manometer
Added links to article references and updated article
references
Revision 03 08/05/08 – Add ref to REAMED
busing article
Building your own
Water manometer for $6 worth of materials in 15 to 30 minutes.
A.K.A. Red-Neck
Manometer
Difficulty level:
EASY
Special Machines
required: NONE
© 2008 Steve
Simpson – www.theCUBEstudio.com - steve@thecubestudio.com
Note:
use the browser back button after viewing links in this document.
$25? $100? More? Water? Digital?
Differential Digital? . . . What
do you really need?
What you need is a water
manometer. You can use a Digital Monometer only if it is the differential type
and then only if it has a lighting fast reaction time. Building you own Red-Neck Manometer is an easy
Do-It-Yourself . . ahem . .
Git-‘Er-Done project. The
materials are available at any hardware store for about the cost of a six-pack
and takes about 15 to 30 minutes to build. In the end, you save money, time and
you have a nice fancy tool to impress your drinkin’ buddies and use on other
projects . . . like balancing the
TBs of a friend or other club members.
This is the Second in a series of tech HOW-TO instructions
for maintaining a crossfire injection system.
Articles released so
far:
Crossfire Throttle Body Rebuild including
Installation of standard Shaft bushings Difficulty Level: EASY – Special machines required:
NONE
http://www.thecubestudio.com/CrossfireThrottleBodyRestoration.htm
A special follow-on
article by request is here:
http://www.thecubestudio.com/CrossfireTechFixingFailedAttemptToRepairBrokenOffScrews.htm
Crossfire
Throttle Body Rebuild including Installation and REAMING of accurate Shaft
bushings Difficulty Level –MEDIUM – Special machines required -
Drill press with vice
http://www.thecubestudio.com/CrossfireThrottleBodyRestorationREAMEDBushings.htm
Straightening bent
shafts and arms. Difficulty level: EASY – Special
machines required: bench Vice.
Above operation IF arms are
loose on shafts. Difficulty level: Moderate – Special machines required:
Brazing torch.
http://www.thecubestudio.com/CrossfireThrottleBodyStraigteningBentThrottleShaftArms.htm
Building your own
water manometer for $6 in materials from any hardware store. Difficulty level: EASY – Special machines required:
NONE
http://www.thecubestudio.com/CrossfireHomeBuiltManometer.htm
Correctly and
accurately balancing the Throttle bodies. Difficulty level: EASY – Special machines required:
Water Manometer, air passage plugs (home made)
Above operation IF balance screw if
still welded. Difficulty level: Moderate – Special machines required: Rotary
cut-off tool or hacksaw
http://www.thecubestudio.com/CrossfireThrottleBodyBalancing.htm
Follow on articles will cover:
Adding sealed
stainless ball bearings to the TB shafts instead of simple bushings. (best)
Difficulty level: Advanced – Special machines required – Lathe
Note: After some thought
and discussion, I have concluded that this is NOT a do-it-yourself project and this article may not be released.
Feel free to comment on that.
Rebuilding the
injector POD. Difficulty level: EASY – Special
Machines required: NONE
This will be the next
article released and the article now contains some optional special performance
modifications which will require
machining. Standard rebuild is still EASY no special tools.
Porting the crossfire
manifold. Difficulty level:
Advanced – Special Machines required: Die Grinder (not a Dremel tool),
Non-ferrous carbide cutters, Sawzall
or rotary cut-off tool,
Milling machine. Metal forming skills.
One additional article
specific to the 1982 Collector Edition Rear Glass Hatch is here:
http://www.thecubestudio.com/CollectorEditionHatchHingeInstallationInstructions.htm
Building your own
Water manometer for $6 worth of materials in 15 to 30 minutes.
First some background on
using a manometer.
Why use a water
manometer? A manometer is used to measure very small amounts of vacuum for the
purpose of measuring flow. When air passes over an opening like the tiny square
hole in the wall of the throttle body bore just above the throttle plate, it
tries to ‘drag’ some air out of the opening which causes a tiny vacuum
proportional to the speed of the air flow. This phenomenon is exploited as a
method to, among other things, balance an HVAC system, and to match the flow thru ( or
‘balance’) two or more carburetors
or in the case of the Crossfire system, throttle bodies.
Properly balancing the Crossfire system is covered in
detail in a separate document, but heer we are interested in the reason for
using a water (or differential digital) manometer.
ANY set of throttle
bodies, no matter now bad, worn out linkage, bent shafts, generally ugly and
nasty . . can be perfectly balanced at idle. That is a fact and “anyone who
says different is selling something.”
Many a crossfire owner has perfectly balanced his setup at idle even
using his shiny new expensive digital manometer, the engine still runs poorly
and he continues the frustrating and seemingly futile search for another
solution. Sound familiar?
Here is an excerpt from my Throttle body
rebuilding instructions:
The standard GM Crossfire throttle bodies are actually 4 cyl models
(the only TBs GM had at the time) and have no bushings or bearings on the
shafts the way many new cars do today. The steel shaft merely twists back and
forth in a drilled hole in the soft
zinc alloy die casting. The resulting wear together with wear in the
linkage itself causes the two throttle bodies to be out of synchronization with
each other. It is very important that the two TBs are open the same amount and
that they open together. Worn shafts and linkage cause the rear throttle body
to open ahead of the front causing a very noticeable stumble. When the throttle
is released, the two throttle bodies do not always come back to the same
resting place so the idle can be good one time and then bad the next and then
good again. This erratic behavior
makes problems very difficult to correctly diagnose by persons not experience
with this system.
TIP: It is wise to do
the throttle body balancing with a water manometer (covered in separate
documents) before you decide you need to add bushings. Once balanced, the water
manometer will tell you the condition of your TB bases and you may be surprised
to discover that they are fine and only the linkage wear, which you will have
adjusted for, was the culprit.
Perhaps the most
important thing you want to know about your crossfire is not how well balanced
it is at idle, but how well it STAYS balanced when you press on the gas pedal.
Instant smooth acceleration, or that infamous crossfire stumble? Only a water manometer connected to
BOTH throttle bodies will show you exactly what is happening when the throttle
moves. The system should stay balanced with throttle movement.
If you balance your TBs perfectly at idle and
then when you touch the throttle the water instantly disappears from the
manometer (usually into the rear TB)
. . you have some work to do on the TB bases, which may include adding
shaft bushings or bearings, straightening the shaft arms or both. Those tasks
are covered in detail in separate articles.
Now that you know why
you need one, let’s move on to our tongue-in-cheek look at building a Red-Neck
manometer!
Shopping
Hit the
local hardware store and buy 12 feet or so of 5/16” or 3/8” clear vinyl tubing.
There are some photos circulating the web of a home made manometer using very
thin tubing . like maybe 1/8”. If you are considering this, slap
yourself or poke yourself in the eye with a sharp stick . . because that will
be less painful that trying to get the bubbles out of 1/8” tubing.
Get
some nylon clips to hold the tubing . . .
if you are an actual genuine red-neck, you may use strips of duct tape
or bent over rusty nails. For a classy read-neck manometer, splurge and get a
get a $1 yardstick. Here again black marks every inch is all you really need,
but the yardstick is in the budget, so go ahead, get crazy.
You
need two one inch long pieces of vacuum hose . . you can buy new or snip some
from your vacuum gage or from under your hood somewhere.
Some
food coloring is nice, but not required. BTW, the term ‘food’ actually means “food, clothing, hands,
garage floor, car body, dog and anything else nearby” coloring.
Now the tricky part is
finding special ‘manometer wood’. This is rare stuff not usually available at
any store. Fortunately it can often be found propped up in the corner of the
average garage, origin unknown, age unknown. It comes in various sizes and is easily
recognized by the brown color.
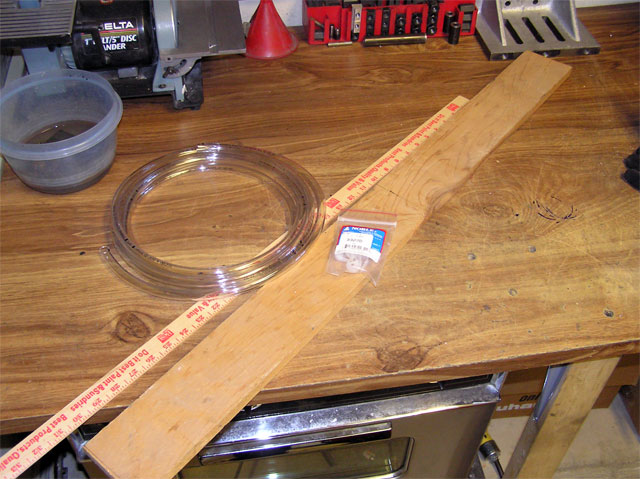
Shopping expedition should
yield a bootay pile similar to this:
http://www.thecubestudio.com/pictures/CF_Manometer/ManometerMaterialsWEB.jpg
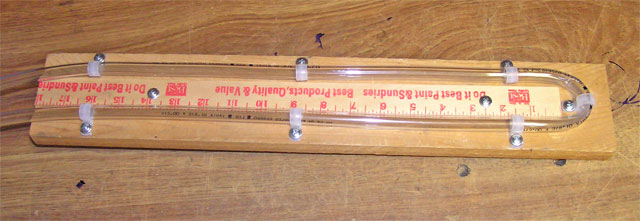
Build
the manometer. (i.e. arrange the bootay like so:)
http://www.thecubestudio.com/pictures/CF_Manometer/ManometerAssembledWEB.jpg
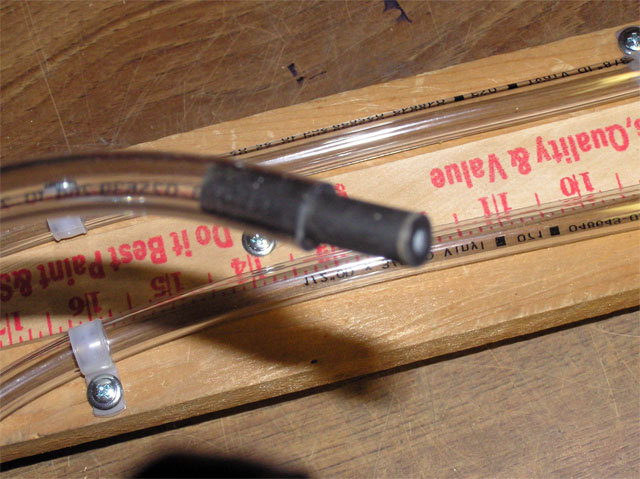
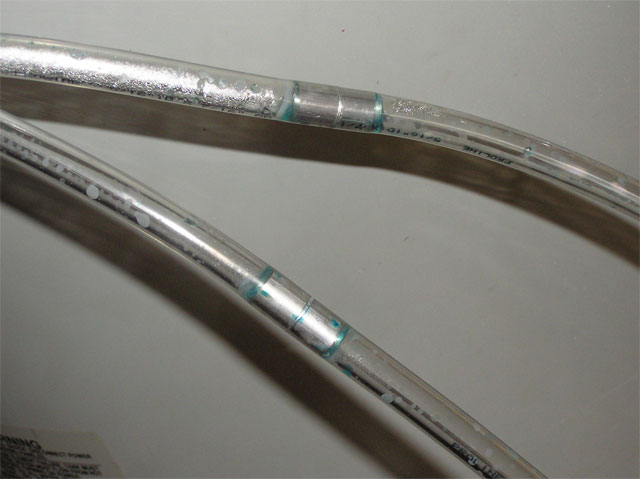
Stick the vacuum tubing
into the ends of the vinyl
http://www.thecubestudio.com/pictures/CF_Manometer/ManometerHoseEndWEB.jpg
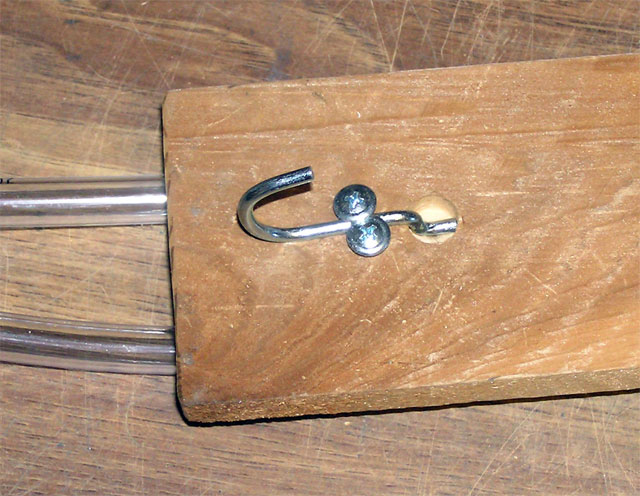
Hardly deserves its own step . . . OK, we’ll do the hanger too:
In keeping with the overall
red-neck theme .. concoct some
form of hanger. Here we see the recycled peg board hanger method.
http://www.thecubestudio.com/pictures/CF_Manometer/ManometerHangerWEB.jpg
Your water manometer is
exactly as accurate as anything you can buy. It is also very . . . responsive, shall we say. If you
hook your manometer up to the port when it is pulling a lot of vacuum, you have
.001 seconds to disconnect it before the water goes bye-bye. Don’t worry about
it if it happens, It will not hurt the engine at all.
You can install restrictors
in the line to dampen the response of the manometer without changing the
accuracy. Any small orifice will do and it actually only has to be in one leg.
I used a piece of aluminum rod with a 1/16” hole drilled thru it. I later
discovered that a very small plastic wall anchor stuck into one of the pieces
of vacuum tubing works almost as
well.
http://www.thecubestudio.com/pictures/CF_Manometer/ManometerRestrictorInstallWEB.jpg
And Viola! (that’s French
for Gosh Dern!) You now have a working manometer!
Just
add water.
You
can mix up some food coloring in a bowl
. . dip one end ogf the manometer tube in the water and suck on the
other end until you get about half the manometer’s height in water sucked in.
Remove the end from the bowl and hold both ends up high and the manometer will
fill up nicely . . .
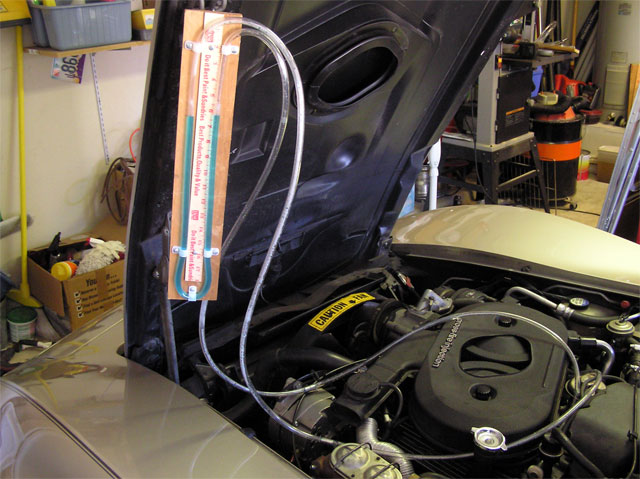
Perform a quality control
test of the hanger mechanism:
http://www.thecubestudio.com/pictures/CF_Manometer/ManometeronCarWEB.jpg
STEP FIVE
Making
companion tools
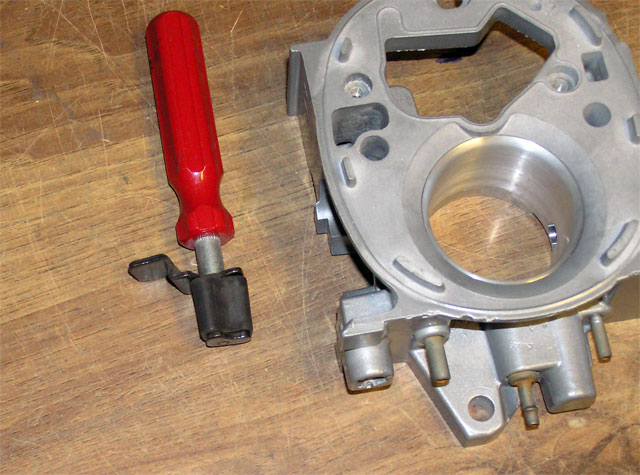
You will need a tool to
block the IAC passage. This can be a special GM tool number J- dash - blah blah
blah:
http://www.thecubestudio.com/pictures/CF_Manometer/ToolJsomethingWEB.jpg
Inserted thus:
http://www.thecubestudio.com/pictures/CF_Manometer/ToolJsomethingInstalledWEB.jpg
If you cannot locate one of
these special tools - and don’t
try very hard because they don’t really work very well –
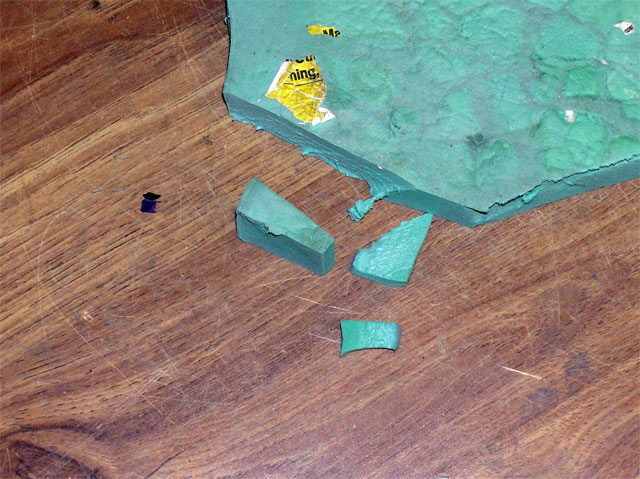
then you can use your newly sharpened fabrication skills to quickly
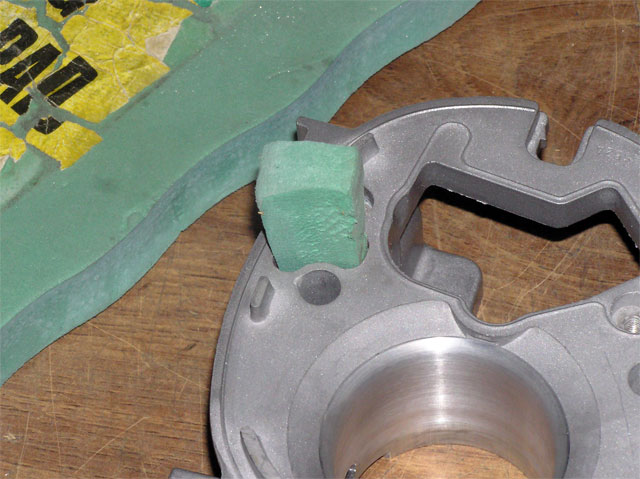
manufacture your own IAC block off tool from a gardener’s kneeling pad available at Home Depot or Lowes
for about 3 bucks. To keep the project costs in line, I just stole one from my
wife’s gardening cart.
This stuff cuts very easy
with a box cutter, utility blade, or huntin’ knife.
http://www.thecubestudio.com/pictures/CF_Manometer/KneelingPadSlicedWEB.jpg
Installation can be tricky,
but with practice . . . photo shows finished RedNeck IAC plug in perfect
alignment ready to be being pushed down to completely seal the hole.
http://www.thecubestudio.com/pictures/CF_Manometer/KneelingPadInstalledWEB.jpg
So there you have it . .
all of the special tools needed for Crossfire Throttle balancing . . but that’s
another article.